
Those vehicles need to be movable, because they are not simply part of the background, but actors in the fights.
Thankfully, those tokens are easy and really fast to make. It is possible to obtain a vehicle in a few minutes, using the ressources available freely on the Sketchup Warehouse.
First, of course, you'll need Sketchup , but also a program that can resize an image.
If that second program can also make some changes at an image, it shall be better, but simple resizing should be enough.
I use Photoshop, because I use it for everything, but GIMP should work as well. And there are simpler utilities available on the web that should also make the job.
Now, let's go to the Sketchup warehouse, where we'll have a look around and let's choose a vehicle.
Why not one with a turret? The Centaur tank destroyer, for exemple.
 After downloading the model, I open it in Sketchup.Here is a screenshot of the program.
 Now, I need to export a view of that vehicle, seen from above, that could be useful for Maptool.
I go to the menu Camera-Standard Views-Above view.
The vehicle is seen from above and I can adjust the view a little, for a better result by clicking and holding the middle mouse button and moving slighly the mouse. This can make the details more visible or understandable.
With most vehicles. The part in Sketchup is finished. I just have to go to Files-Export-2D view, choose png and check the options.
 When exporting, it is important to go to the options and make sure that the transparent background button is checked.
Here is our result (the background is transparent, it is blogger that makes it look white).
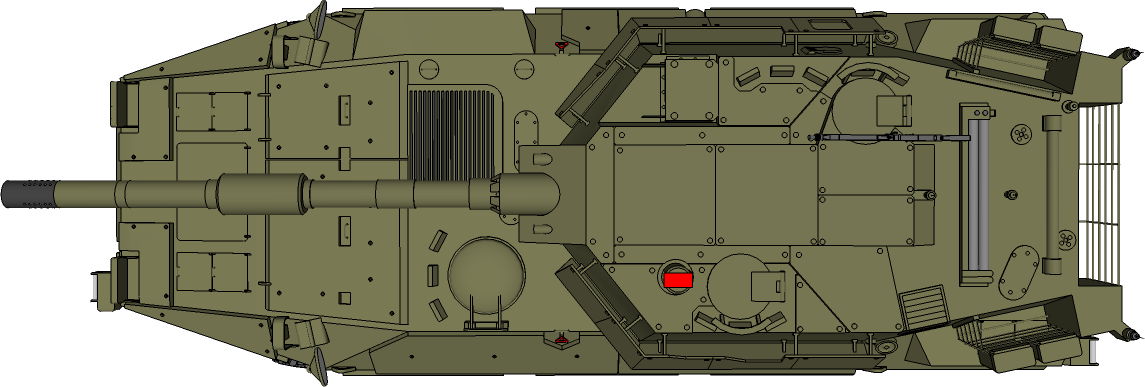
I just need to take that image to Photoshop, Gimp, or any other image processing program and resize it at my scale in Maptool (128 pixels per square in my case, but YMMV). As I don't know the real dimensions of the vehicle, I'll have to eyeball it.
You could also use that step to add an external line and a shadow, making the vehicle stand better against your background. So, I make a stroke around the drawing and I add a shadow to the layer. This is not mandatory.
Normaly, the process should be finished by saving the result in png, but, our vehicle here was a two parts vehicle, with a frame and a turret. So, it would be better if it was possible to make two tokens, one for each part.
Let's go back at the beginning, re-open Sketchup and, now, let's take care of that turret.
As you can see on the Sketchup screenshot above, there is a window opened at the right. This is the layers window (Windows-Layers). By checking and unchecking the different buttons, I make parts of the vehicle visible or not.
To separate the frame from the turret, I just have to make an export with the turret parts hidden and one with the frame parts hidden.
Sometimes, it is possible that the different parts of your vehicle have not been placed on different layers by the designer. Then you'll have to make it yourself. Select the parts you want to separate, right-click it, choose Entity Infos and choose the layer you want them to be placed upon.
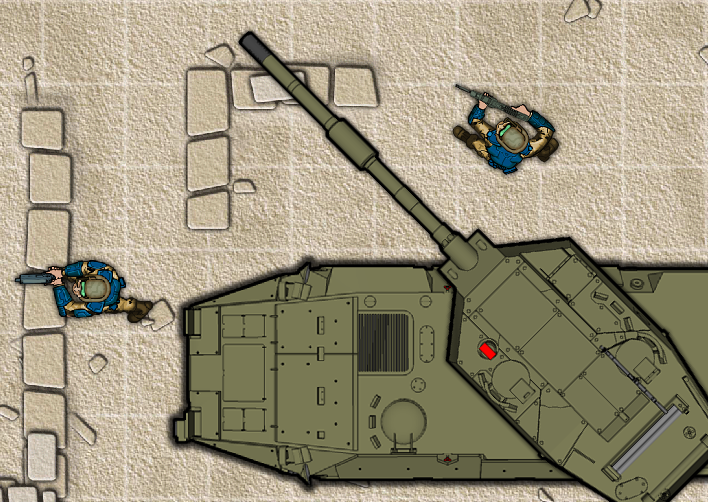
And here is our result, a brand new Maptool vehicle fighting along Devin Night SF tokens. And it took probably less than 5 minutes to do it. Much less time than writing that post...
 The possibilities are not limited at what I have shown here. Some vehicles (mostly the bigger ones) in the Sketchup Warehouse have an internal view. By making the external layers invisible, you can obtain the floorplan of the vehicle.
And there are not only vehicles in the warehouse. Have a look around and you should find lots and lots of structures begging to be used in Maptool.
